使用飞书创建自己的通知机器人
使用飞书来创建自己的通知机器人。
什么是飞书?为什么使用飞书?
其实就是字节跳动旗下的企业微信或者钉钉。但是因为一些原因不喜欢使用企业微信和钉钉,之前的通知一直用的都是Bark(关于Bark的搭建之前也有一篇分享)。
目前飞书已经全平台都有客户端了,Mac的M1架构也有,所以使用起来是没有问题的。
创建通知机器人
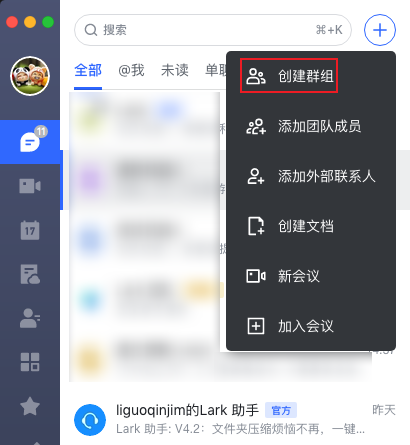
1.创建群聊
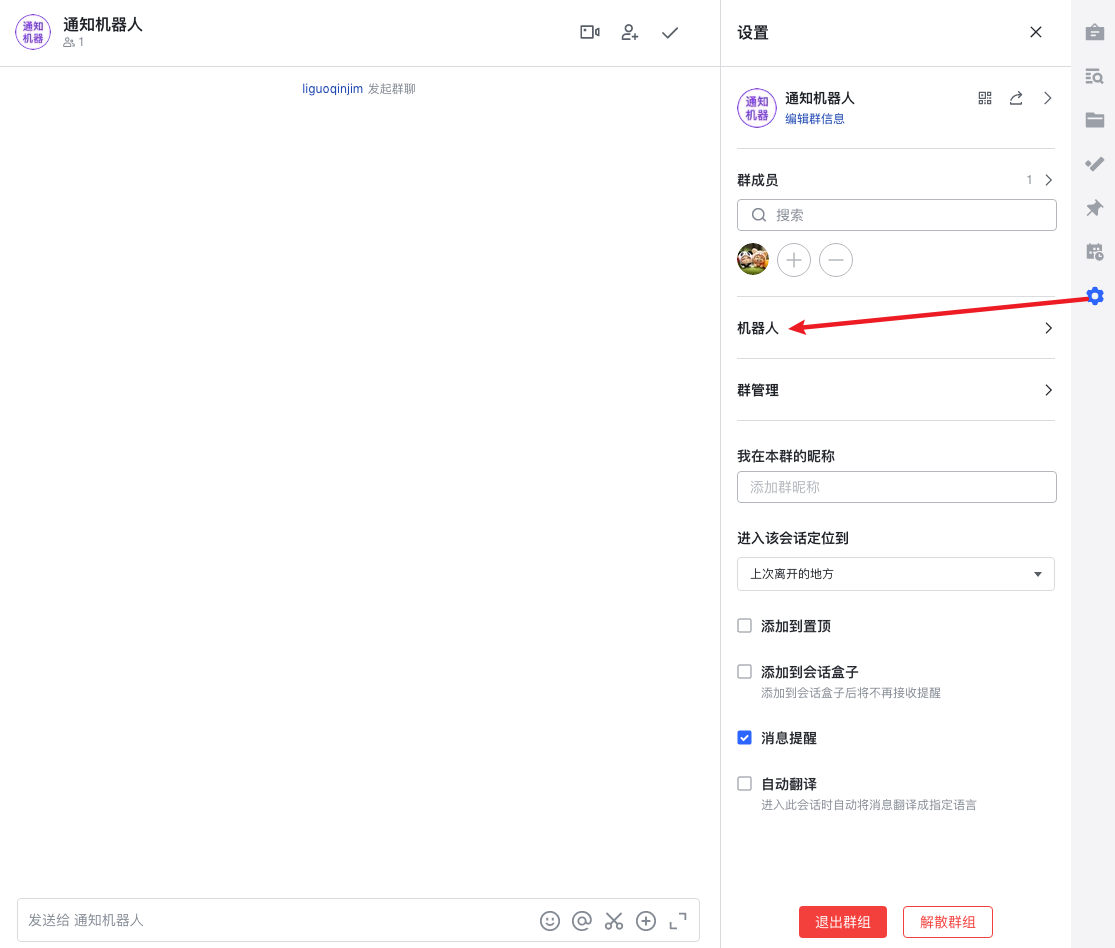
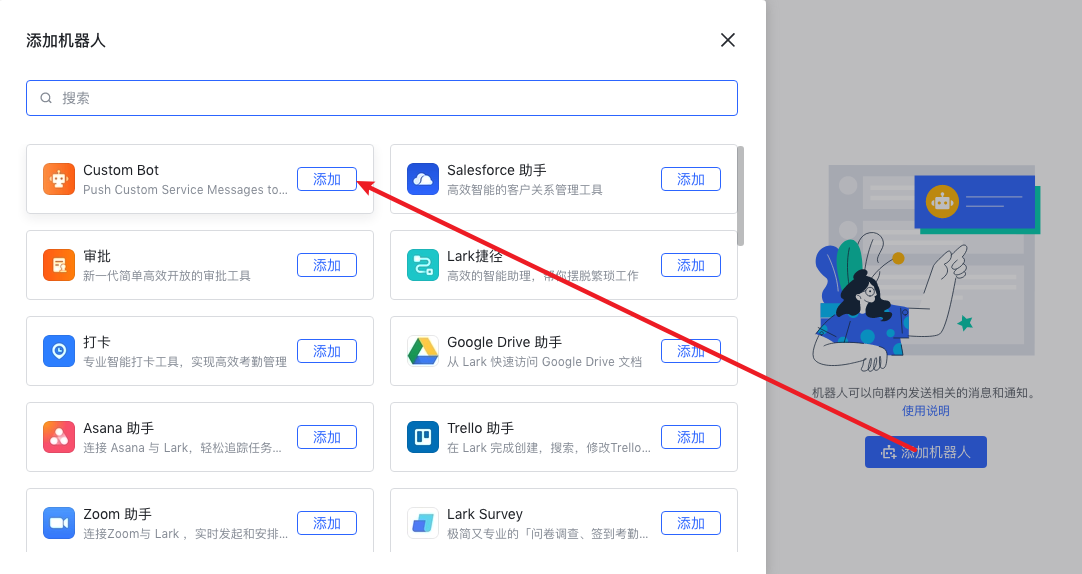
2.群内创建通知机器人
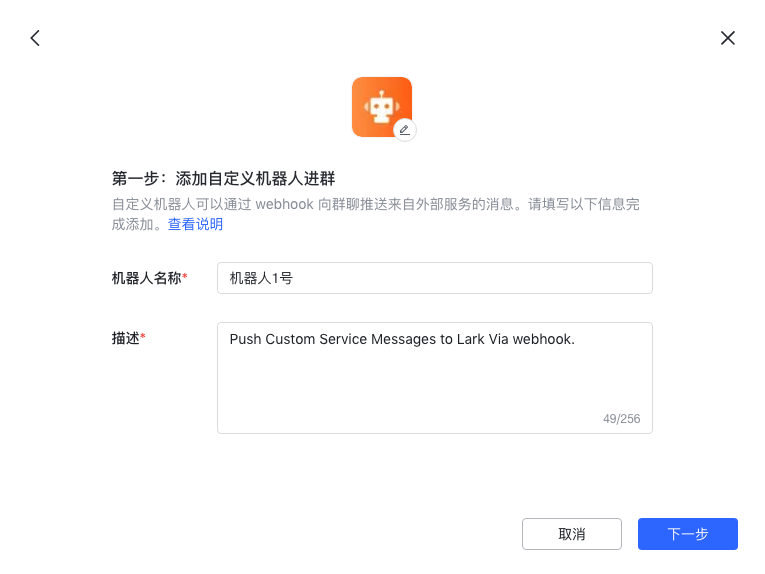
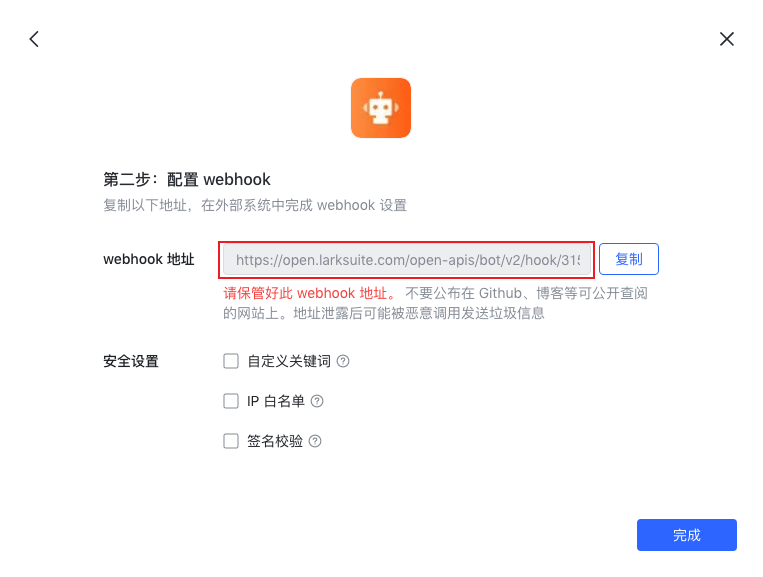
最后这个webhook地址要保存好,也不要泄露。
消息种类
文本
就是单纯的文本

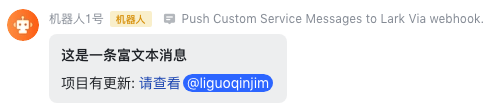
富文本
可以支持@他人、插入超链接等元素。
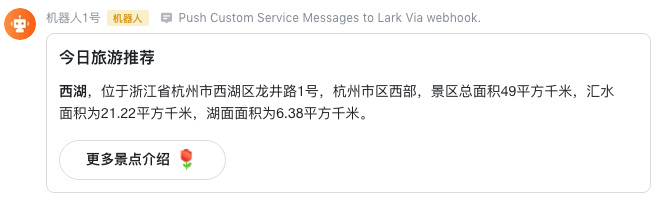
消息卡片
消息卡片可由按钮、图片等多种组件类型搭建而成。
代码
以文本消息为例
curl
curl --location --request POST 'https://open.larksuite.com/open-apis/bot/v2/hook/your-bot-url' --header 'Content-Type: application/json' --data-raw '{
    "msg_type": "text",
    "content": {
        "text": "这是一条文本消息"
    }
} '
golang
package main

import (
  "fmt"
  "strings"
  "net/http"
  "io/ioutil"
)

func main() {

  url := "https://open.larksuite.com/open-apis/bot/v2/hook/your-bot-url"
  method := "POST"

  payload := strings.NewReader(`{
    "msg_type": "text",
    "content": {
        "text": "这是一条文本消息"
    }
} `)

  client := &http.Client {
  }
  req, err := http.NewRequest(method, url, payload)

  if err != nil {
    fmt.Println(err)
    return
  }
  req.Header.Add("Content-Type", "application/json")

  res, err := client.Do(req)
  if err != nil {
    fmt.Println(err)
    return
  }
  defer res.Body.Close()

  body, err := ioutil.ReadAll(res.Body)
  if err != nil {
    fmt.Println(err)
    return
  }
  fmt.Println(string(body))
}
python
import requests
import json

url = "https://open.larksuite.com/open-apis/bot/v2/hook/your-bot-url"

payload = json.dumps({
  "msg_type": "text",
  "content": {
    "text": "这是一条文本消息"
  }
})
headers = {
  'Content-Type': 'application/json'
}

response = requests.request("POST", url, headers=headers, data=payload)

print(response.text)
查看自己的userid
使用场景
目前我遇到过这种使用场景,每条消息最好都通过机器人发送,但是只想其中的达到某些条件的消息飞书会提醒。
要解决这种场景的话,可以把群消息屏蔽,然后发送消息种类为富文本消息,在消息中@自己。这样就只有@的消息才会弹出app提醒。
富文本消息结构
{
    "msg_type": "post",
    "content": {
        "post": {
            "zh_cn": {
                "title": "这是一条富文本消息",
                "content": [
                    [
                        {
                            "tag": "text",
                            "text": "项目有更新: "
                        },
                        {
                            "tag": "a",
                            "text": "请查看",
                            "href": "http://www.example.com/"
                        },
                        {
                            "tag": "at",
                            "user_id": "your-user_id"
                        }
                    ]
                ]
            }
        }
    }
}
查看自己的user_id
但是自己的飞书user_id不是那么好找,至少我找了好久,要是大家有简单的路径也请告诉我下😀
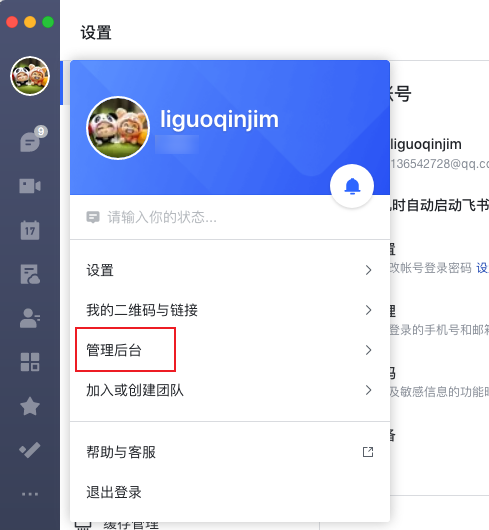 这里默认了大家会创建一个自己的团队,点击之后会打开一个网页。
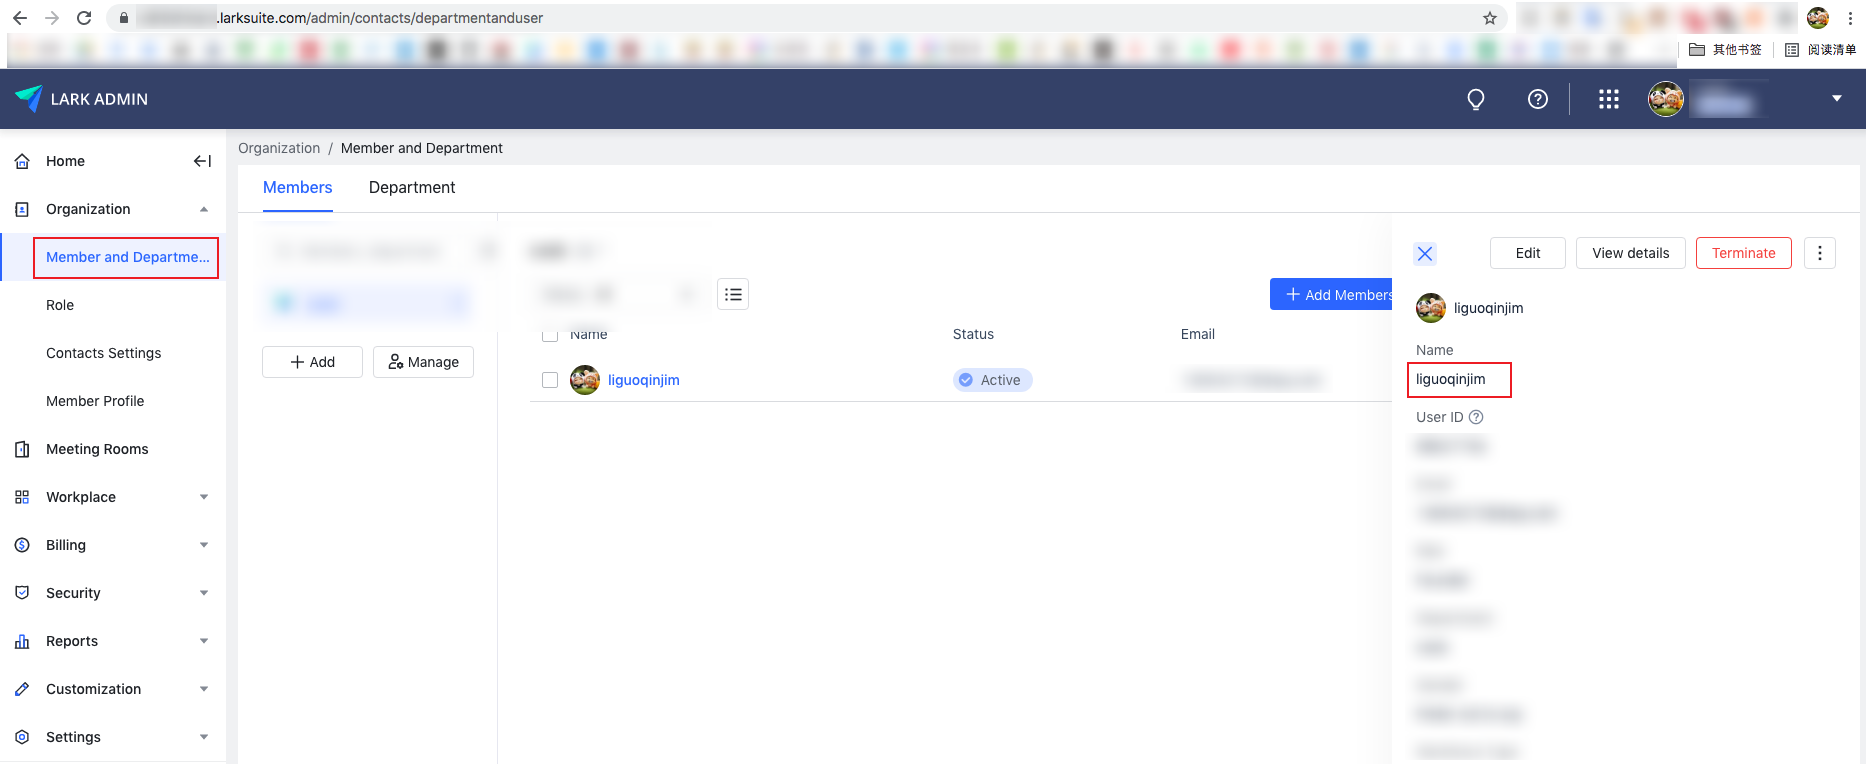 在团队的member里面点击自己就有user_id了。
相关链接
TODO
- 发送图片消息(需要创建custom application才可以。之后弄好了会更新)